I
stitched the hexagons together kind of like a zipper to make a tube.


I
pieced the batting layer together with a herringbone stitch.

Next, I
stitched the bottom together and took out the paper templates.


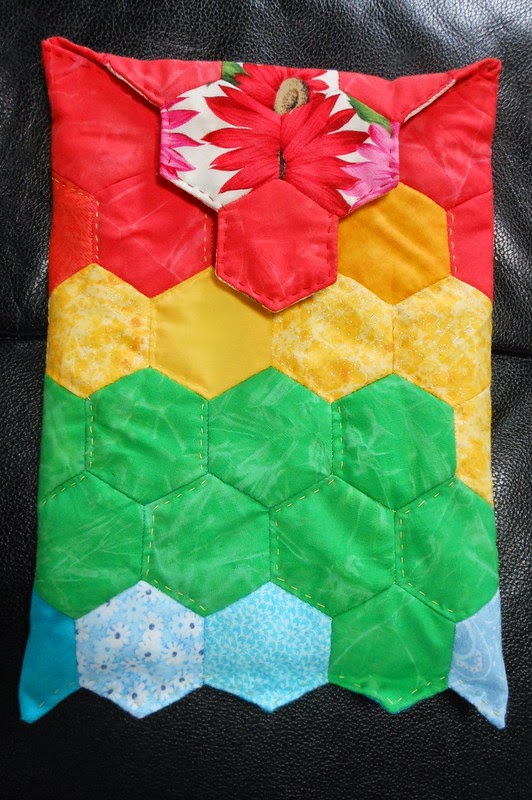
I like
the no binding flip edge, so I used it again on this for the top edging/flap.


I
stitched the inside lining closed on top of the batting (it’s still inside out
at this point).


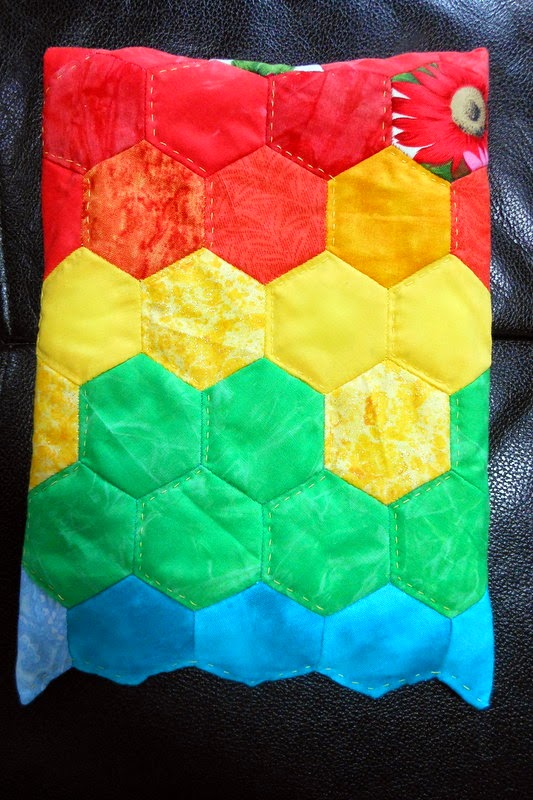
Here it
is right side out, needing two rows of quilting, where it was joined together.


Next I
had to finish the quilting on the front where it was joined.


I also
did a line of quilting along the top flap and the bottom edge.
To keep
the flap closed, I attached three Velcro dots.
Velcro is called magic tape here.

Have
you guessed what this little pouch is made for?
It’s specially made for Ted’s iPad mini.

That’s
not the end of the story. I wasn’t sure
that Ted would close the Velcro properly and I didn’t want the iPad to fall out
of the pouch, so I added some little elastic shoulders that would easily
stretch to put the iPad in or take it out, but not let it accidently fall out. Now - Finished!


Linking
up with Jessica at Life Under Quilts. Check out Hibiscus Stitches for even more epp.
I would never have guessed you were making an iPad cover! What a wonderful surprise! I hope Ted felt the same and will love using it, knowing that there is a little bit of love in every stitch!
ReplyDeleteYou have made great progress this week!
Fiddly is right! But, absolutely gorgeous!
ReplyDeleteWonderful finish.
ReplyDeleteThe bag is gorgeous.
you are genius! Thanks for walking us through your process~
ReplyDeleteThis is lovely. I can't imagine doing this myself though. It looks very difficult with the inside out stitching and such.
ReplyDeleteWow, Pamela, this turned out beautiful! And very practical as well.
ReplyDeleteSweet! You are very craft! Love this!
ReplyDeleteSo cute and a great idea!
ReplyDeleteI love the elastic shoulder straps for the tablet! That is so clever. Beautiful and cheerful. Well done you! You had as all guessing. I had decided you were making a sewing machine cover, for some reason, so I obviously got the scale completely wrong! JJ
ReplyDeleteWhat a great idea - and a lovely finish. xx
ReplyDeleteThis is absolutely wonderful! I never would have figured out how to flip it like that. Your elastic idea is super smart, too.
ReplyDeleteHi Pamela! Wow what a very smart idea & so beautifully made too! Ted's device is well protected now...
ReplyDeleteThank You for linking with 'Piece Yourself Together!'
Great colors! Neat idea!
ReplyDeleteVery clever use of hexies, love this
ReplyDelete